Project Betwixt
Overview
“Project BeTwixt” is an adventure platformer game developed during an internship project. Aimed to deliver a product for a client based on their published book.
You play as a child dragged into another frequency of the normal world with magical critters and objects that usually is not present. Team up with a critter to bring their friends back home to their magical house.
My role in this project was Lead System Designer and Technical Combat Designer where I developed and implemented the main mechanic and the combat and ability system. Later in the project took over the role of Narrative Designer, where I iterated on the dialogue system and wrote dialogues. As well as the role of Product Owner in the later part of the project to guide my team to the finish line and regain and keep up the morale.
Lead System Design
As a Lead System Designer I was leading a team of 4 designers, me included, and delegated tasks and oversaw the process of the design, prototyping and iteration phases to ensure all of our tasks where finished within deadline goals.
This was made possible by doing daily stand ups every morning to update each other on our progress. With the information we’ve shared, I could easily assess the current situation. Thanks to this we could easily adapt when we encountered difficulties and could shift focus and take one team member to assist where help was needed.
I encouraged all of my team member to be active in collaborating with other departments to make sure that their design work turned out as they envisioned it. Since our main mechanic included a variety of abilities that behaved differently, I proposed that each designers built an example block out level to showcase to Level Designers the basic intended usage of their mechanics.
As soon as all of our tasks where finished we could regroup to discuss new features or mechanics that could be possible for the game to enhance the player experience. Otherwise we’d also allocate the workforce to assist other departments like Level Design.
Combat & Enemy Design
With the game being a platformer I wanted to keep the combat minimal and snappy to have it as a palette cleanser between what is the main focus of the game, which is platforming and exploration.
With our main mechanic being that we are throwing our companion to trigger different abilities, I suggested that we can use the companion for when we are attacking as well. And make it both cute and silly by making it follow the player when they are spinning. And any enemy contact while spinning would bonk and push the enemies and turn them back to normal “Critters”. More about this later.
I started off with researching how similar games in this genre handles combat and attack animations. A game that uses similar mechanic as our idea is Hells Pie which also has a companion following after the player, and is being used in their attacks. As well as Super Mario Galaxy which attack feels like a very quick Point Black AoE damage detection in a radius around Mario.
As I didn’t want to complicate the combat way to much, but to still make the attacks feel impactful, I implemented a combat system framework I’ve used for prototype projects before and would work well for this project.
References
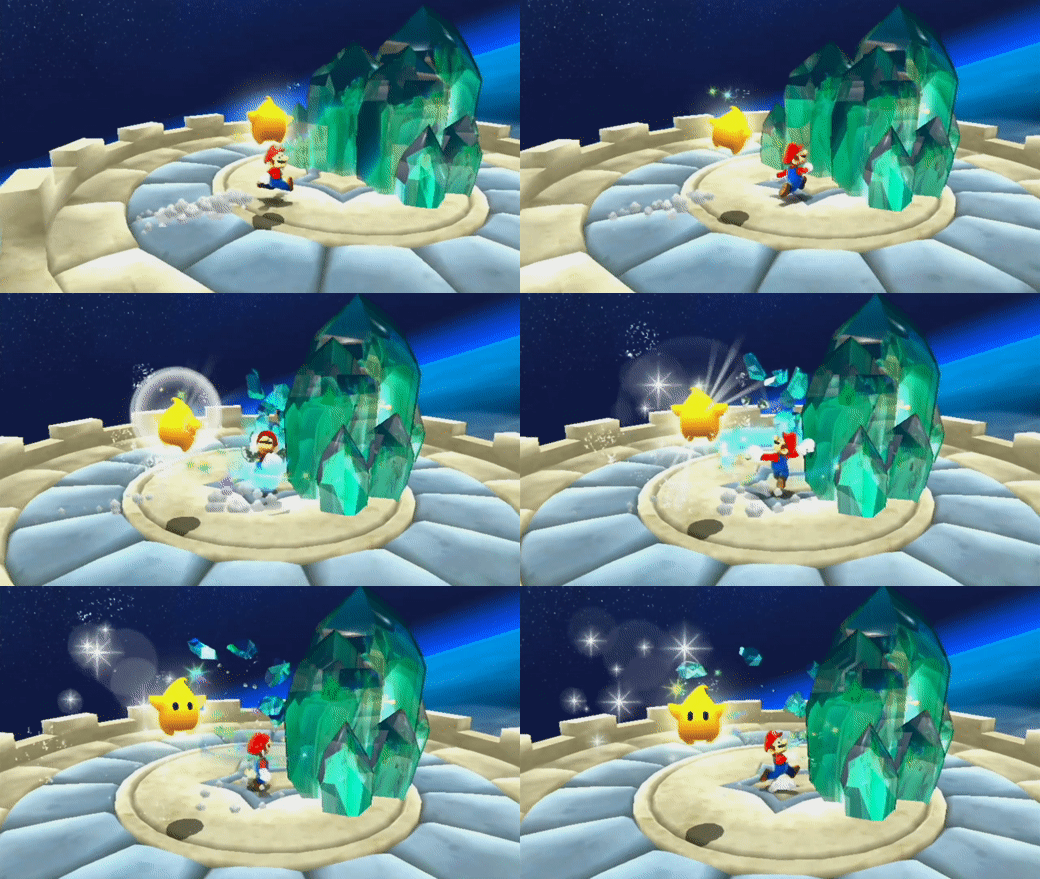
The combat system is a bit intricate. So I’ll go over some of the fundamentals.
For the players attack I wanted to make it feel responsive when you’re attacking the enemies. So I’m aiming to only deal damage whenever the Companion Critter actually collides with the enemies capsule collision component.
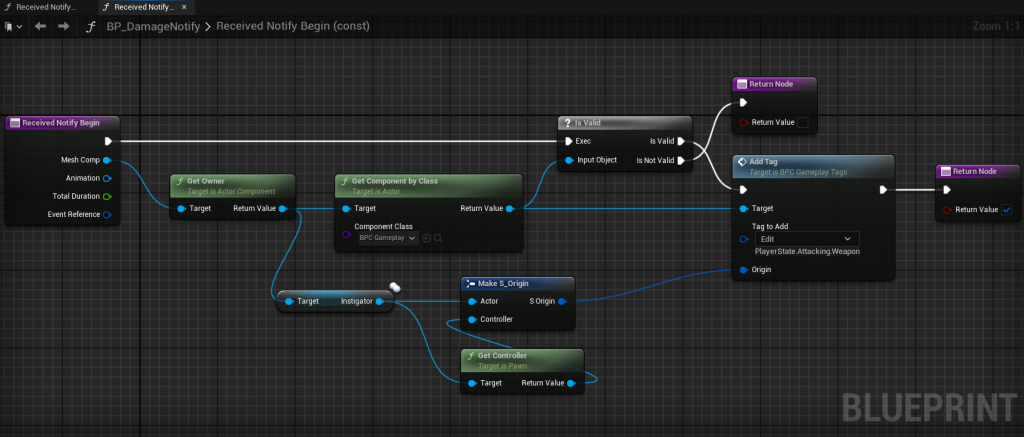
I utilized Unreal Engines built in Gameplay Tag feature and implemented a Gameplay Tag and a Combat Blueprint Component. The Gameplay Tag component is responsible for handling, adding and removing Gameplay Tags. Such as handling attributes like Health and states like Death, as well as add and remove tags for when the player is attacking. Which is being added through animation montages with Notifies
Meanwhile, the Combat Component listens to when these tags are changing and can fire off events based on addition or removal of tags. Below is how the component is listening for the State.Attacking.Weapon tag to fire off an event to enable and disable Tick in the component. The Ticks function can be seen further down
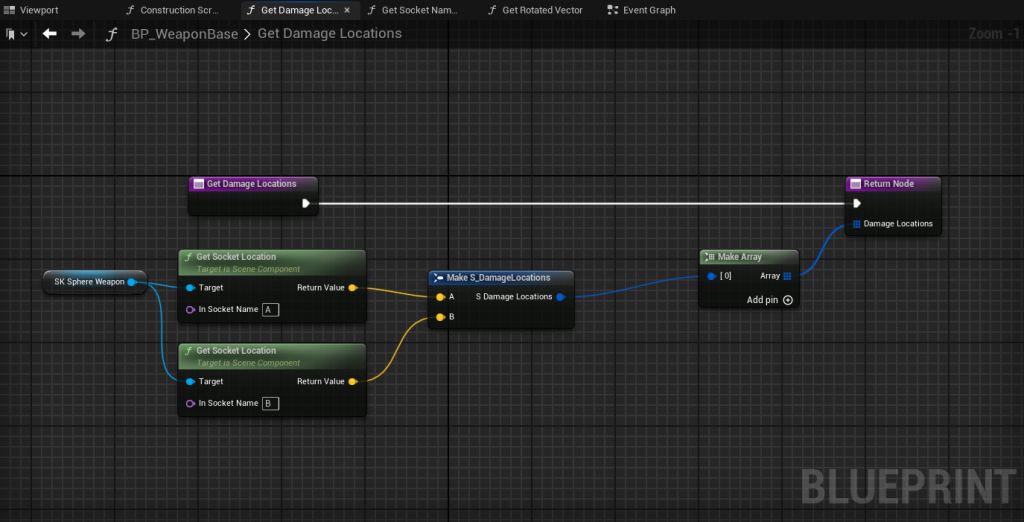
At first I made a function where I allocated 2 sockets in the skeletal mesh of the Companion “weapon” prototype and passed them through a struct to store the vector points to later use as Start and End point in a Sphere Trace function. This worked fine at first with the first prototype which was just an attached mesh to the Player Character, but turned out to cause inconsistent and buggy traces when we implemented a function where the Companion would follow the player. The sockets works better for actual weapons that the player wields, such as swords, axes or other simple weapons.
Instead we simplified it by using the Companion actor/”Equipped Weapon” and the owner of the combat component as Start and End points. Resulting in a consistent and more believable hit detection.
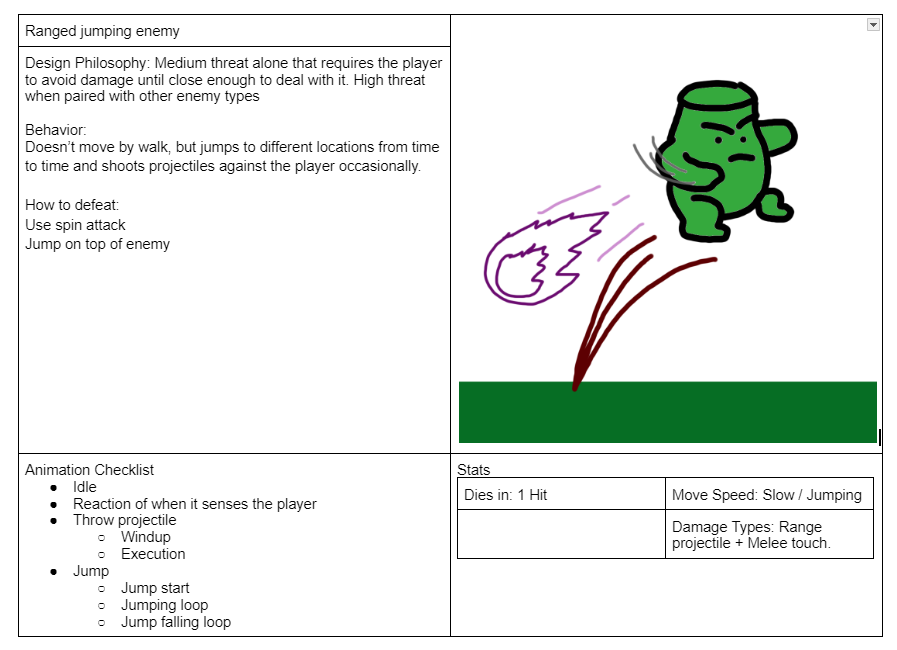
I documented my design of the enemies with description of the enemies behavior and my design philosophy to clearly communicate to both character artist and AI programmer what I envision the enemies to act in the game. I also included an animation checklist for the animator and made sure to have as much as possible at the ready and to clearly communicate what would be needed instead of giving vague wishes.
Abilities
The Ability Component is working in conjunction with the Combat Component, and depending on the ability, is also utilizing Gameplay Tags and Animation Montage Notifies in similar fashion as attacking. But additionally, the Ability Component can handle spawning in external actors with their own events by again, using Animation Montage and a Notify State.
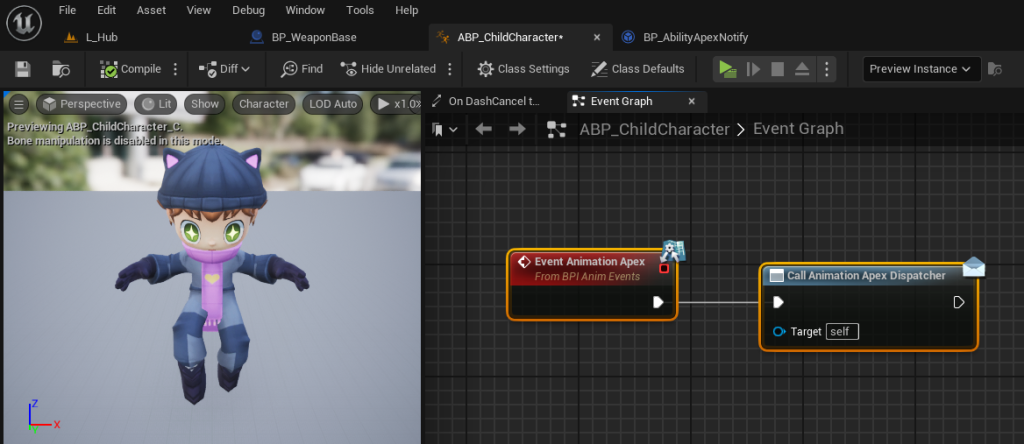
Using an Interface to allow communication between the Animation Blueprint and the Base Ability Blueprint and Event Dispatcher to be able to listen whenever a Notify is being reached in an animation. This setup is extremely scalable, applicable to any character and makes it very easy for designers to create new content in collaboration with other roles.
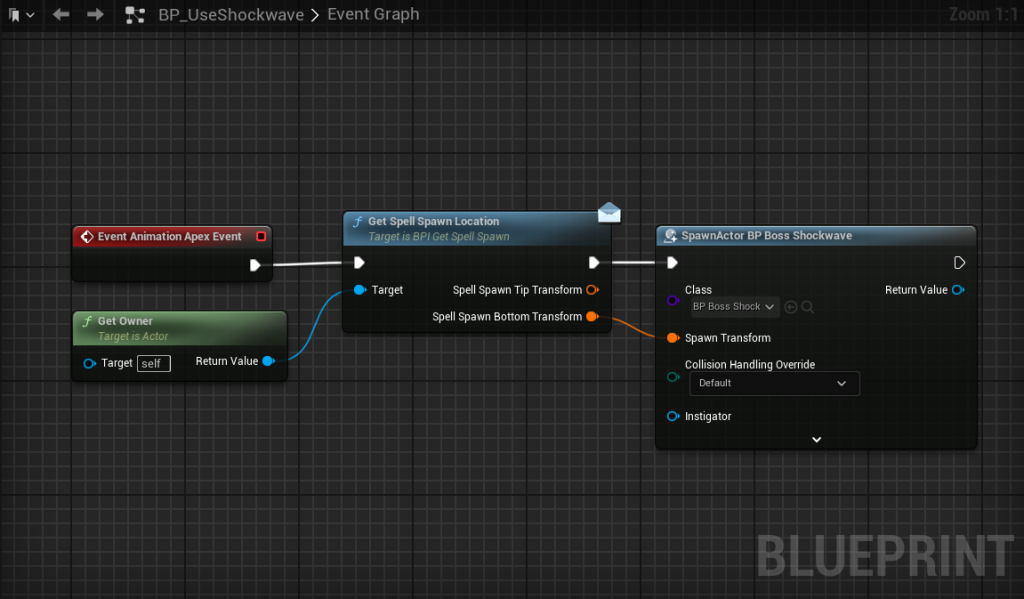
3. In the ability itself I can decide what to spawn in at the Apex, while the spawned Actor runs it’s event at Begin Play.

4. What I have to do is to add in all of the abilities the Actor should be able to use. All of which are a child of the Base Ability Blueprint.
In the end, by collaborating with 3D artist, VFX artist, Gameplay Designer and myself as a stand-in animator and Boss Designer, we were able to create some attacks for a boss in the game.
Narrative Design
While we initially had a team member designated as the Narrative Designer, their lack of engagement and contribution led to the team deciding to continue the project without them. To ensure the narrative works to rekindle, I took on the responsibility of re-writing some of the narrative pieces and later on collaborating with the UI team to develop the dialogue and progression tools.
For me to have an easier time on when to write the story and dialogue I started with writing down the characteristics of some of the characters. I took inspiration from the book that the game is based on, and applied some personalities from the characters within it.
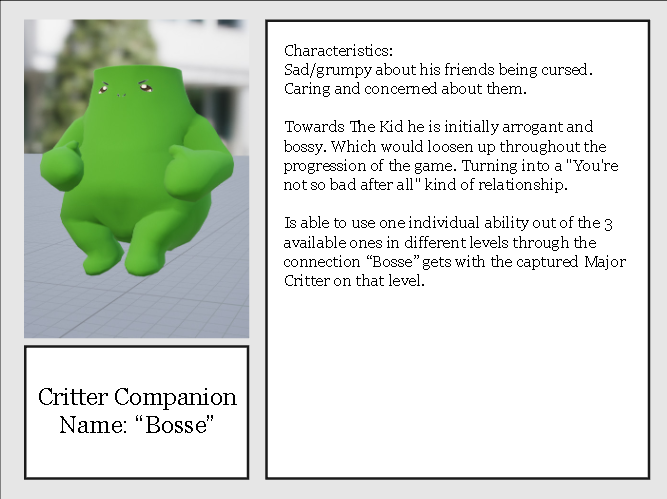
All of the critters are a bit snarky towards humans, so I wanted to make sure that the companion would start of as a bit resilient and mocking towards the player. Ultimately agreeing on teaming up for the sake of rescuing their friends. I had in mind for a sort of “Rough Start Friendship” trope for the development of the companion character and the relationship they would grow with the player. For them to eventually become more and more friendly and proud of the player further into the game.
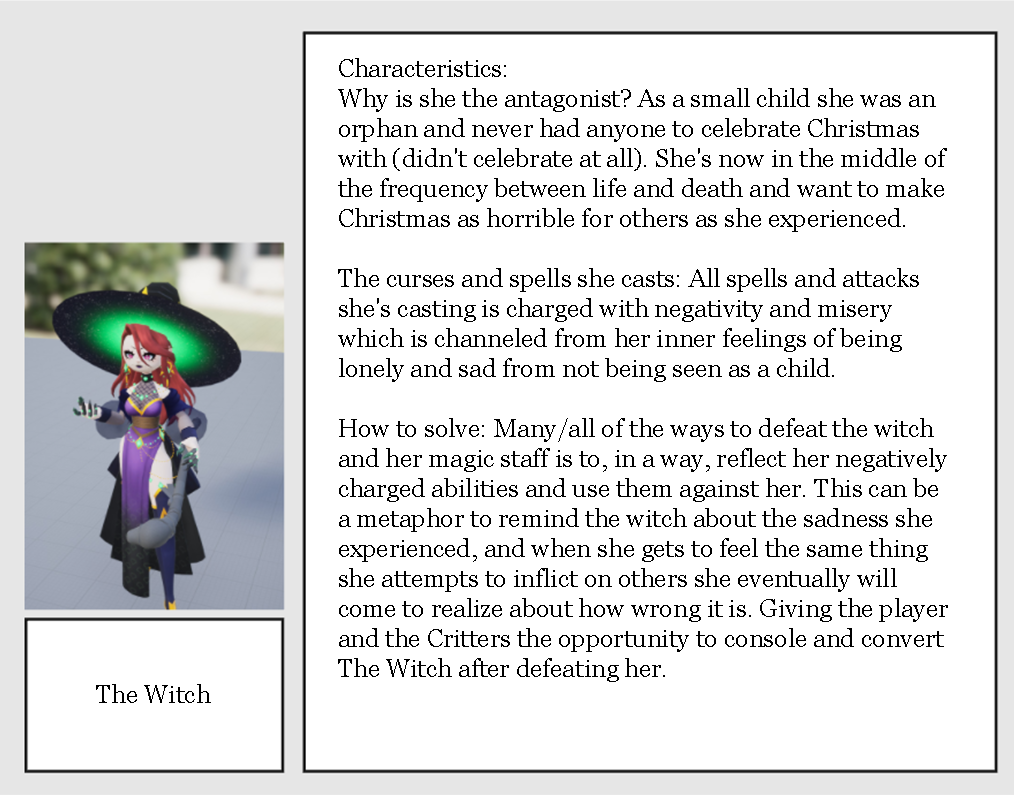
In the book, the Witch is portrayed as a young girl, an unsettling blend of human and nature. Her true form is dark and otherworldly, with floating, hollow shadows for eyes and centipedes replacing her limbs. I envisioned this transformation as a progression throughout the narrative. Initially introduced as a more typical witch figure, her true form would be revealed as she becomes increasingly angry and hostile toward the player.
This design aims to emphasize the tension and escalation in her character arc, mirroring the player’s progression and the stakes of the story.
Dialogue System
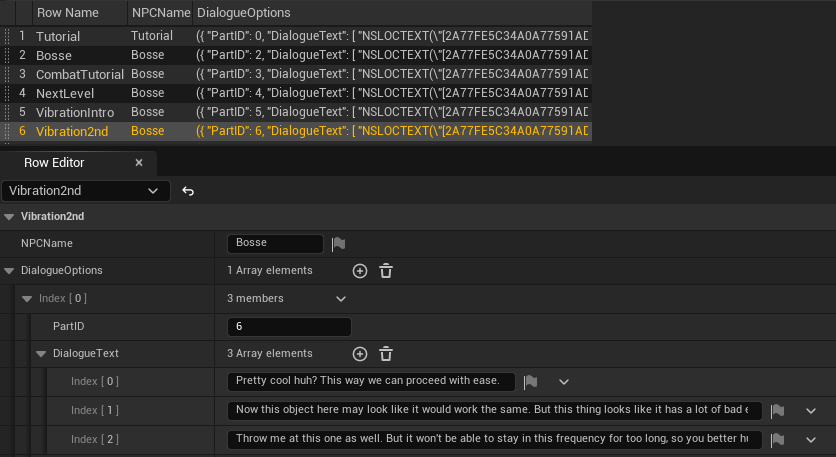
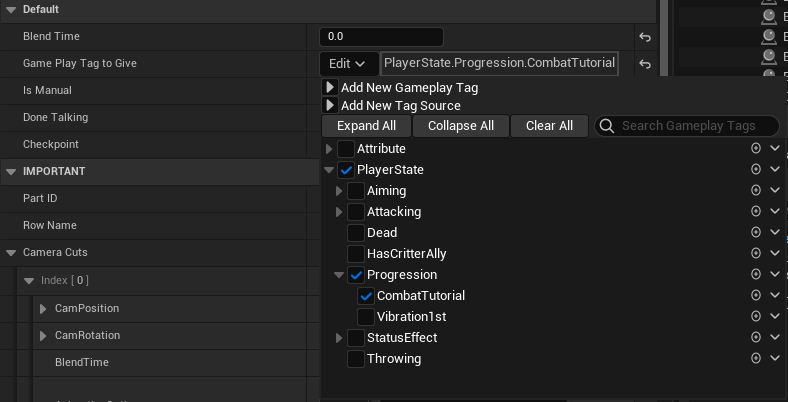
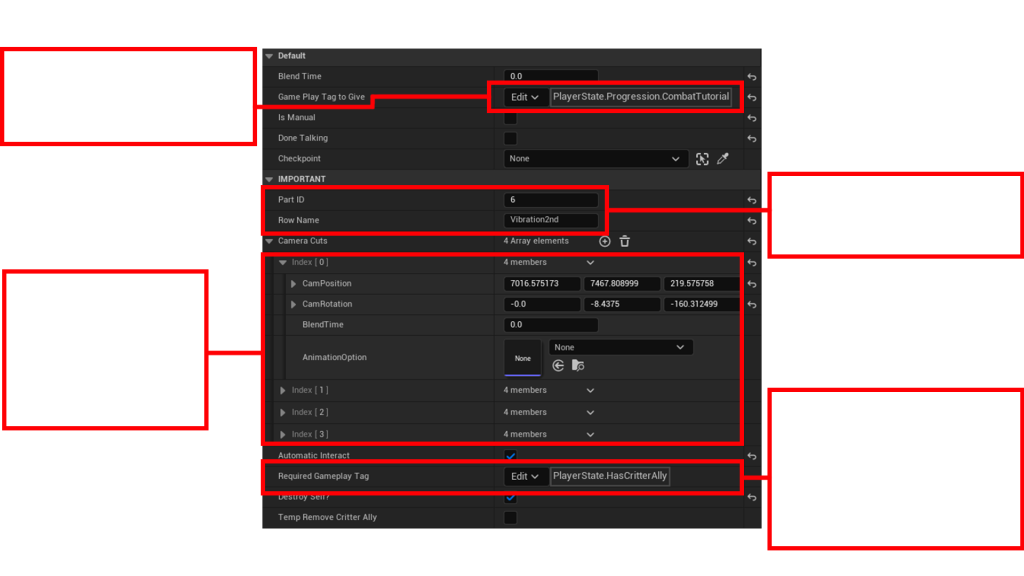
Showcase of dialogue system in play with collision triggers and camera cuts in mid-dialogue.
Summary of My Contributions
- Designed the core mechanic of throwing the critter companion with different effect result based on selected ability.
- Throwing mechanic: Prototyped and iterated a throwing mechanic with trajectory path to project to the player where the critter would fly when thrown.
- Critter ability effect: Created the base actor for all of the intended critter ability and implemented the ones my fellow system designers built.
- Created the combat system component which could be applied to the player and any other actors (Enemies, bosses and destructible object) based on if they could be affected by combat.
- Combat: Designed the combat to be simple but engaging by making it light hearted and a bit goofy.
- Enemies that took damage would get rag dolled away for the goofy effect.
- Designed and implemented that defeated enemies dropped the currency of the game and turned back to normal nice critters to reward players engaging in combat and to fit the narrative.
2. Enemy and Boss Design: Designed and documented different enemy behavior to give varied enemy encounters.
- Took over the Narrative Design role and rewrote the narrative setting and designed narrative systems in collaboration with the UI programmer.
- Dialogue System: Designed and iterated a dialogue system after implementation which included row based camera behavior which could either do camera cuts or camera movements depending on chosen parameter.
